Custom Login Page
Setting Up a Custom Login Page for a Meeting
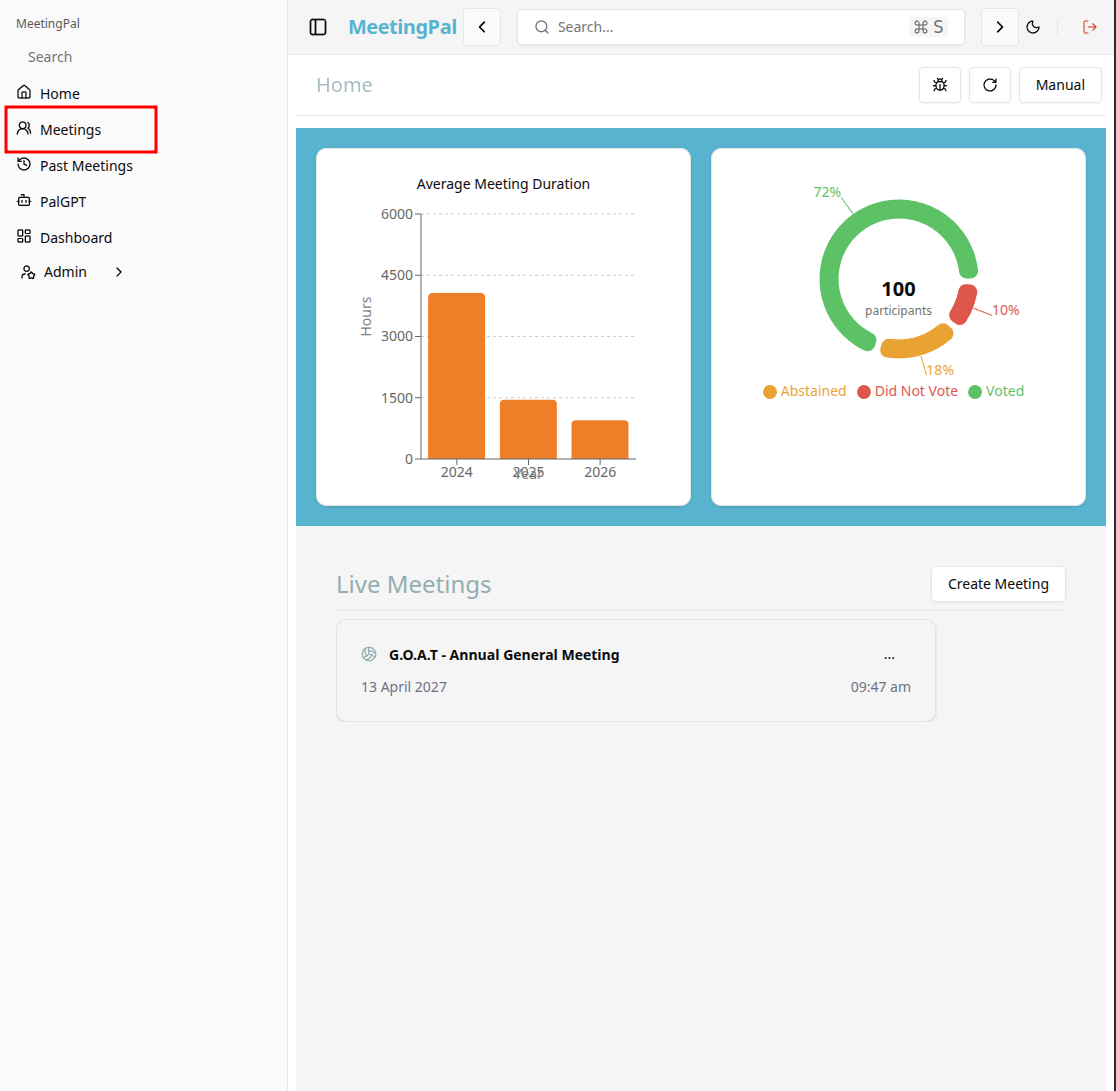
Access the Scheduled Meeting
On the MeetingPal Home Page, locate the left-hand menu. Select Meetings.
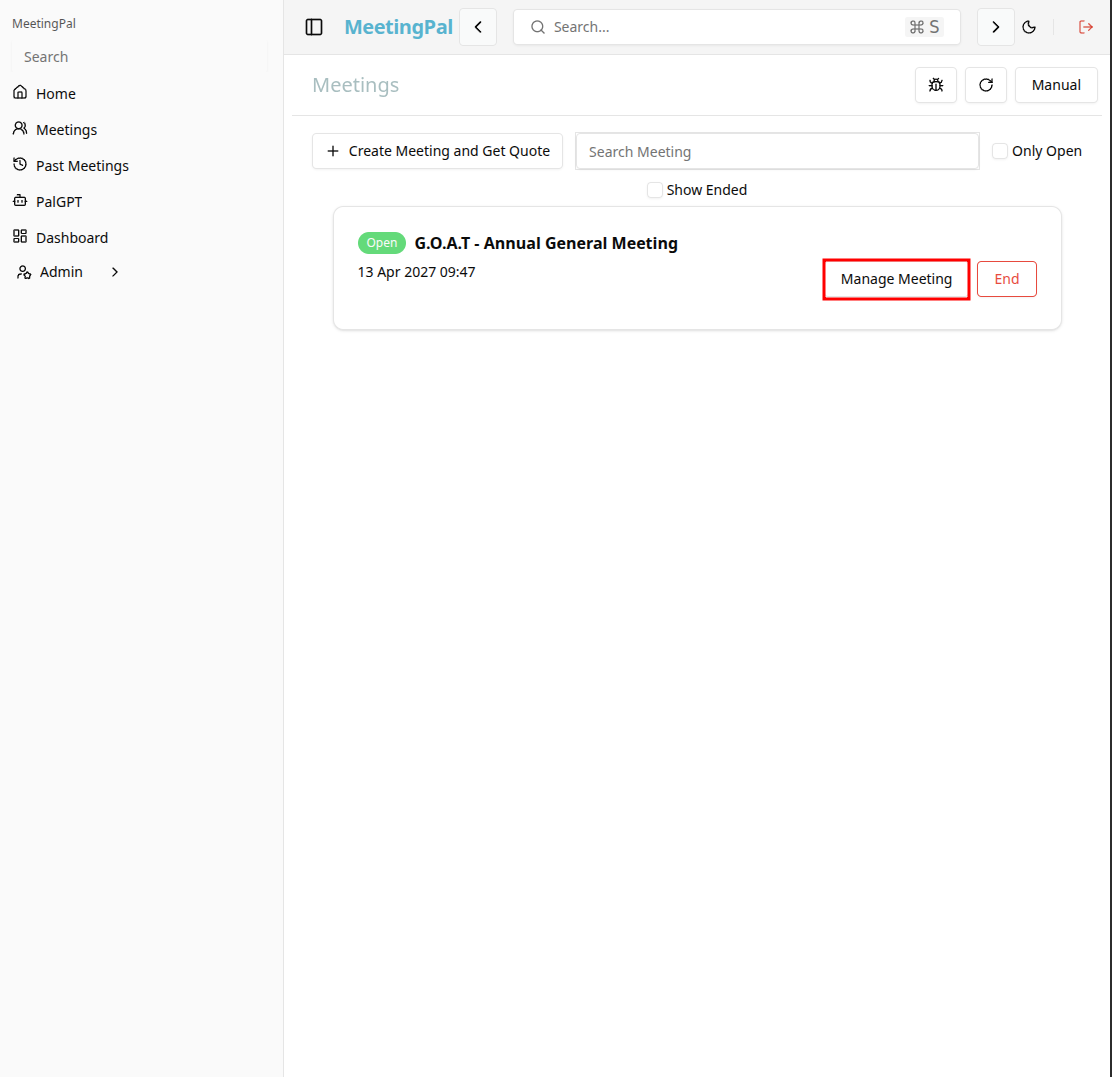
Start editing the meeting
In the meetings page ,you will see all your meetings and the meetings that you are scheduled to attend.
Click on the 'Manage Meeting' button to begin editing the selected meeting.
Open the Meeting Settings
In the selected meeting’s dropdown menu, click Settings or Meeting Settings.
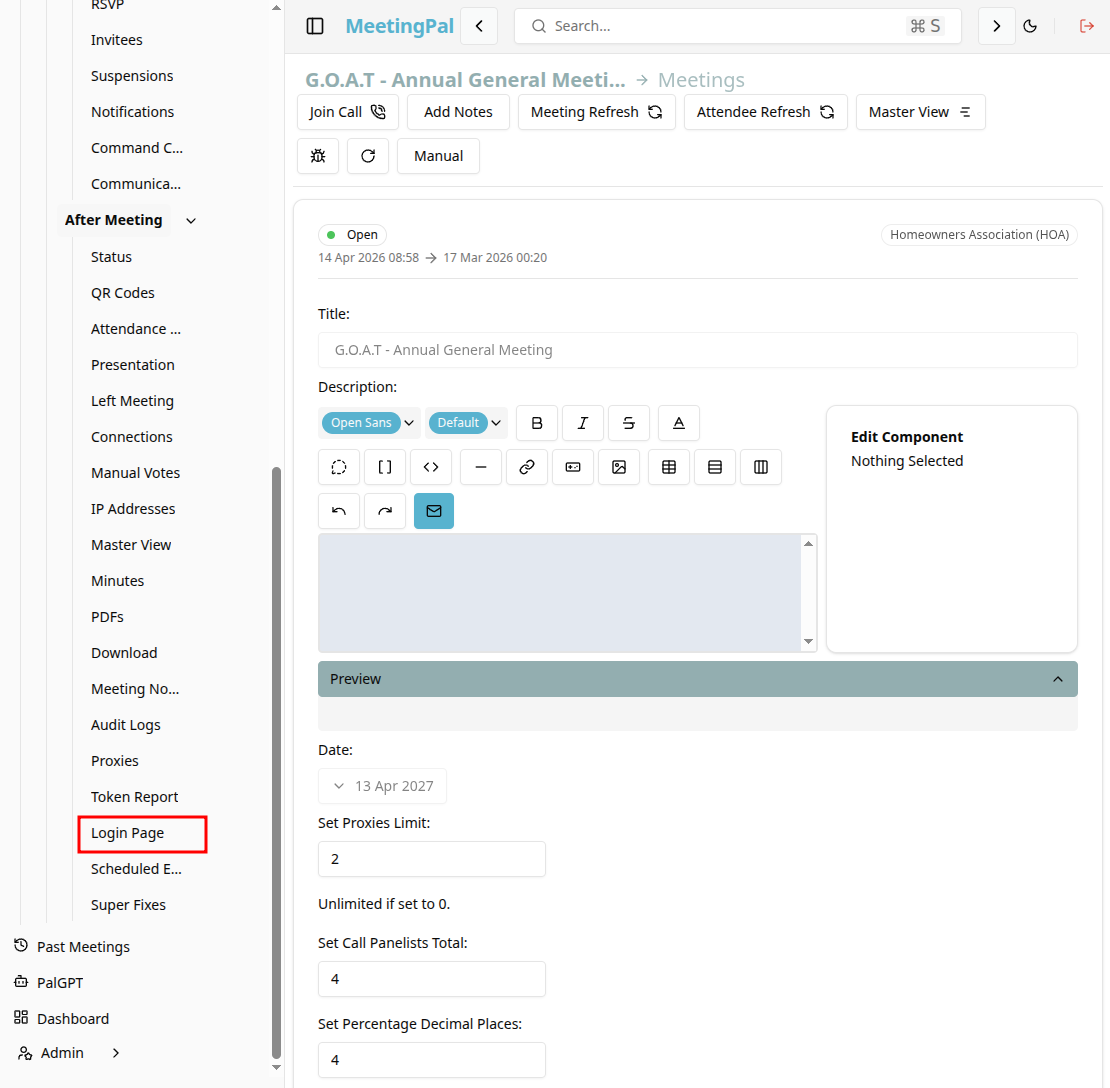
The Meeting Settings page will open.
Navigate to the Custom Login Page Section
Scroll through the settings menu until you find the Custom Login Page section.
Select Enable Custom Login Page if it is not already enabled.
Customize the Login Page
On the Custom Login Page section, you can configure the attendee login experience by:
- Uploading a custom company or meeting logo.
- Adding a custom welcome message for attendees.
- Changing the background image or colours.
- Adding meeting-specific instructions.
- Configuring login requirements for attendees.
Ensure all required fields and branding elements are completed before saving.
Preview the Login Page
Select Preview Login Page to review how attendees will see the page before the meeting begins.
- Confirm that:
- Branding displays correctly.
- Instructions are accurate.
- Login fields function as expected.
- Meeting information is correct.
Share the Meeting Login Link
Copy the meeting’s attendee login link from the meeting details page.
Share the link with attendees via email invites or other communication channels.
Important Notes
The custom login page applies only to the selected meeting.
Attendees will use this page to access the meeting and related voting features.
Changes to the login page can be updated at any time before the meeting begins.
Some branding and customization options may depend on your organization’s MeetingPal configuration.
If attendees experience login issues, advise them to refresh the page.